

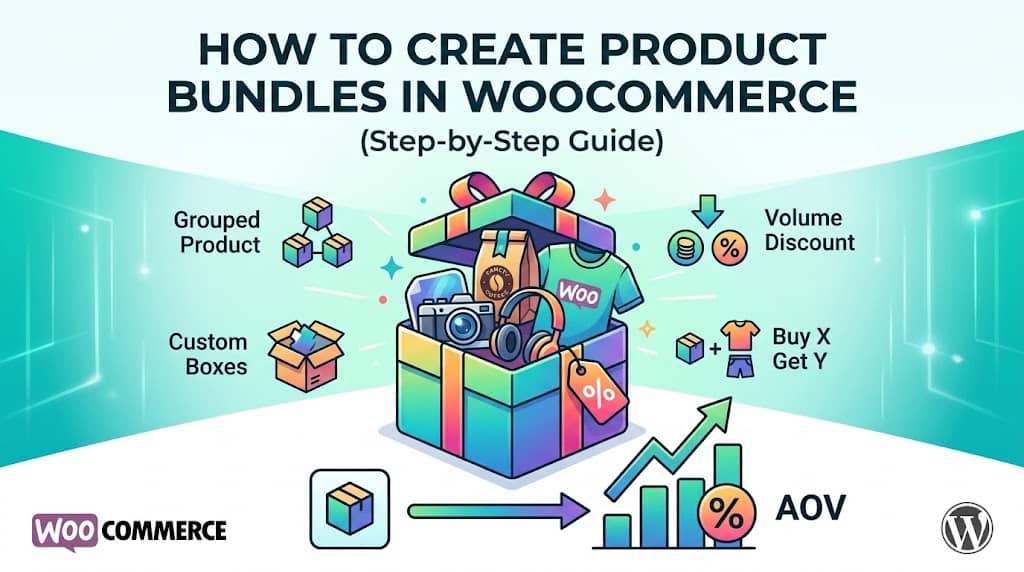
If you run a WooCommerce store, you’ve probably noticed that customers who buy more in a single order are far more valuable than those who buy just one item. Product bundles are one of the simplest and most effective ways to increase your average order value (AOV) — and they’re easier to set up than most people think.
In this complete guide, you’ll learn how to create bundle products in WooCommerce using two methods: a powerful dedicated plugin (our top recommendation) and WooCommerce’s free built-in “Grouped Product” option. By the end, you’ll also have a solid understanding of best practices for pricing, discounts, and stock management for your bundles.
Let’s dive straight in.
Why Bundle Products in WooCommerce?
Before we jump into the “how,” it’s worth spending a moment on the “why.” Understanding the business case for product bundling will help you design bundles that actually convert.
Here’s why bundle products in WooCommerce are a game-changer for your store:
- Increase Average Order Value (AOV): When customers buy a bundle instead of a single item, they naturally spend more per transaction.
- Clear slow-moving inventory: Pair best-sellers with slow movers to offload stock without running clearance sales that devalue your brand.
- Simplify the buying decision: Instead of forcing customers to browse dozens of products, a well-designed bundle says “here’s everything you need.”
- Build perceived value: A bundle priced at a slight discount feels like a great deal, even if the savings are modest.
- Reduce marketing costs: Selling multiple items in one transaction is far cheaper than acquiring multiple separate orders.
- Boost customer satisfaction: Complementary products sold together mean customers get a complete solution — leading to better reviews and repeat purchases.
Now that you know why bundling matters, let’s look at how to create bundle products in WooCommerce — starting with the most powerful and flexible method.
Method 1: How to Create Bundles in WooCommerce with BundlePress (Recommended)
If you want a professional, flexible, and visually stunning bundle experience for your WooCommerce store, the BundlePress plugin is hands-down our top recommendation. Here’s why.
5 Bundle Types Supported by BundlePress
One of the biggest advantages of BundlePress is the sheer variety of bundle types it supports. Here’s a quick overview before we walk through the setup steps:
Fixed Bundle
Pre-defined sets of products sold together at a fixed price. Great for gift boxes, starter kits, and curated product sets.
Volume Pricing (Tiered Discount)
Reward bulk buyers with tiered discounts. Buy 2 get 10% off, Buy 3 get 15% off — fully configurable.
Buy X Get Y (BXGY)
Classic BOGO and “Buy 2 Get 1” promotions to clear stock and drive volume sales.
Mix & Match
Let customers build their own custom box from specific product categories — perfect for hampers and subscription boxes.
Frequently Bought Together (FBT)
Amazon-style one-click upsell blocks on individual product pages to encourage customers to add complementary items.
Step-by-Step: How to Create a Bundle Product in WooCommerce Using BundlePress
Install and Activate BundlePress
To get started, go to your WordPress admin dashboard and navigate to Plugins → Add New Plugin. In the search bar, type “BundlePress” and hit Enter. You’ll see the BundlePress – Advanced Grouped Product Bundle Builder plugin by Dominopress. Click Install Now and then Activate.
💡 Pro Tip: Once activated, BundlePress will automatically redirect you to its main dashboard. It also creates the necessary database tables for tracking your bundles and analytics.
Open the BundlePress Dashboard
After activation, you’ll see a new BundlePress menu item in your WordPress admin sidebar (indicated by a cart icon). It has four key sub-menu items:
- All Bundles — View and manage all your existing bundles
- Create New Bundle — Start building a new bundle
- Analytics — Track bundle performance (Pro)
- Customization — Style your bundles globally
Click BundlePress → Create New Bundle to begin.
Choose Your Bundle Type
BundlePress will present you with a clean, intuitive bundle builder interface. Your first decision is to select what type of bundle you want to create. For most stores starting out with how to add bundle products in WooCommerce, we recommend starting with a Fixed Bundle — it’s the most straightforward.
Which bundle type should you pick?
- Fixed Bundle → Gift boxes, starter kits, “complete sets”
- Volume Pricing → Consumables, cosmetics, food items
- Buy X Get Y → Clearance promotions, seasonal sales
- Mix & Match → Subscription boxes, hampers, custom packs
- Frequently Bought Together → Tech accessories, apparel add-ons
Name Your Bundle and Set Display Settings
Give your bundle a clear, compelling name (e.g., “Morning Coffee Starter Kit” or “Complete Skincare Bundle”). This name will appear as the bundle’s heading on your product pages.
Next, configure the display settings — BundlePress lets you choose between List View (products stacked vertically) and Grid View (products in a multi-column grid). Grid View is set as the optimized default for Volume Discount bundles, while List View is the default for other types. You can also specify the target WooCommerce product page(s) where this bundle will be displayed.
Add Products to Your Bundle
This is the core step. Click the product picker to search for and add your WooCommerce products to the bundle. BundlePress’s powerful product picker lets you:
- Search products by name or keyword
- Filter by product category or tag
- Add simple or variable products
- Set each product as Mandatory (always in the bundle) or Optional (customer can uncheck)
- Define minimum and maximum quantities per product
⚠️ Free Plan Note: The free version of BundlePress allows up to 3 products per bundle. Upgrade to BundlePress Pro for unlimited product selection and variable product support.
Configure Pricing & Discounts
BundlePress gives you flexible pricing controls that go far beyond what WooCommerce offers natively. Depending on your bundle type, you can:
| Bundle Type | Pricing Option | Example |
|---|---|---|
| Fixed Bundle | Fixed price or % discount off total | 3 items = $29.99 (save 15%) |
| Volume Pricing | Tiered % discounts per quantity | Buy 3 = 10% off, Buy 5 = 20% off |
| Buy X Get Y | Free items or % discount on Y | Buy 2 shirts, get 1 free |
| Mix & Match | Per-box fixed or % off category | Fill a box of 6 = $24.99 |
BundlePress also correctly calculates the “You Save” badge based on the true WooCommerce regular price vs. the sale price, so your customers always see accurate savings information.
Customize the Bundle’s Appearance
Navigate to BundlePress → Customization to control how your bundles look on the front end. The Customization dashboard uses a clean, accordion-based layout where you can:
- Set global theme colors, fonts, and button styles
- Customize badge text and colors (e.g., “Popular,” “Best Value”)
- Override styles on a per-bundle basis (Pro)
- Preview changes in real-time before saving
- Localize all frontend labels and badges to any language
Save and Preview Your Bundle
Once you’re happy with your configuration, hit Save. BundlePress will immediately deploy the bundle on your designated product page(s). Visit the product page on your storefront to see your new bundle in action. The bundle is fully mobile-responsive and will look great on any device — desktop, tablet, or smartphone.
🚀 Unlock More Power with BundlePress Pro
Get unlimited products per bundle, variable product support, advanced conditional logic (show bundles by user role, cart total, geo, or date), the Analytics Dashboard, and priority support from the Dominopress team.
Method 2: How to Create Bundles in WooCommerce Using the Built-in Grouped Product (Free, No Plugin)
If you’re on a tight budget or just want a basic solution, WooCommerce includes a native Grouped Product type that lets you link multiple individual products together on a single page. This is WooCommerce’s closest built-in equivalent to a bundle — though it’s far more limited than what a dedicated plugin like BundlePress offers.
⚠️ Important Note: WooCommerce’s Grouped Product is NOT a true bundle. Products in a Grouped Product are still sold individually — each at its own price. There is no combined pricing, no bundle discounts, and no single “add all to cart” button. For real bundling functionality, Method 1 (BundlePress) is the correct approach.
That said, here’s exactly how to make a bundle in WooCommerce using the native Grouped Product feature:
Create the Individual Child Products First
Before you can group products, each item must exist as its own WooCommerce product. Go to Products → Add New for each product you want to include in your group. Make sure each product is published and has a price set.
Create a New Grouped Product
Go to Products → Add New to create a new product. This will be your “parent” grouped product — the page where all the linked items will appear together.
Give it a descriptive name, write a compelling product description, and add a featured image that represents the group as a whole.
Set the Product Type to “Grouped Product”
Scroll down to the Product Data meta box. Click on the Product Type dropdown (it shows “Simple product” by default) and select Grouped product. The interface will update to show the relevant options for grouped products.
Link the Child Products
In the Linked Products tab within the Product Data box, find the Grouped products field. Start typing the name of one of your child products and select it from the dropdown. Repeat this for each product you want to include in the group.
💡 You can add as many child products as you like. WooCommerce does not limit the number of products in a Grouped Product.
Link Child Products Back to the Parent (Optional but Recommended)
For the best customer experience, go back to each child product and in its Linked Products tab, set the Grouping field to point to your parent Grouped Product. This allows WooCommerce to display the breadcrumb trail correctly and helps customers navigate back to the group page.
Publish and Test
Click Publish on your Grouped Product. Visit the product page to see all your child products listed together with individual quantity selectors and an “Add to Cart” button for each. Note that each item is added to the cart separately at its own price — there is no combined bundle discount.
BundlePress vs. WooCommerce Grouped Product: Side-by-Side Comparison
| Feature | BundlePress | WC Grouped Product |
|---|---|---|
| Bundle Discount / Pricing | ✅ Yes (fixed price, % off) | ❌ No |
| Single “Add All to Cart” Button | ✅ Yes | ❌ No (individual) |
| Volume / Tiered Discounts | ✅ Yes | ❌ No |
| Buy X Get Y Promotions | ✅ Yes | ❌ No |
| Mix & Match / Custom Boxes | ✅ Yes | ❌ No |
| Frequently Bought Together | ✅ Yes | ❌ No |
| Visual Customization | ✅ Full control | ❌ Theme-dependent |
| Analytics & Reporting | ✅ Yes (Pro) | ❌ No |
| Cost | Free + Pro Plans | 100% Free |
Best Practices for WooCommerce Product Bundling
Now that you know how to bundle products in WooCommerce, let’s make sure your bundles actually convert. Here are the most important best practices for pricing, discounts, and stock management:
1
Price Bundles to Feel Like a Deal — But Protect Your Margins
The classic sweet spot for bundle discounts is 10–20% off the combined individual price. This is enough to motivate the purchase without significantly eroding your margins. Avoid discounts below 5% (customers won’t notice) or above 30% (raises quality concerns and kills profitability).
- Calculate your cost of goods sold (COGS) for all items in the bundle before setting a price
- Factor in shipping costs — bundles are heavier and may shift you into a higher weight bracket
- Use BundlePress’s “You Save” badge to make the discount visible and compelling at a glance
2
Use Psychological Pricing Techniques
The way you present your bundle price matters as much as the price itself. Use these proven techniques:
- Anchor pricing: Always show the original combined price crossed out next to the bundle price
- Charm pricing: Price bundles at $X.99 or $X.97 rather than round numbers
- Tier labeling: Use badge labels like “Best Value” or “Most Popular” on your volume tiers (available in BundlePress)
- Default tier selection: Pre-select the tier you most want to sell in volume bundles — BundlePress lets you do this from the admin
3
Bundle Products That Actually Belong Together
Relevance is everything. A bundle that groups products customers naturally use together will always outperform a randomly assembled package. Ask yourself:
- Do these products solve the same problem or serve the same use case?
- Would a customer realistically buy all these items in one sitting?
- Does adding Product B make Product A more valuable or easier to use?
Classic examples: camera + memory card + carrying case; coffee beans + grinder + filters; yoga mat + blocks + strap.
4
Manage Stock Carefully for Bundled Products
Stock management is one of the trickiest aspects of product bundles in WooCommerce. Here’s how to handle it correctly:
- WooCommerce automatically deducts stock from each child product when a bundle is sold via BundlePress — you don’t need a separate bundle stock count
- If a child product runs out of stock, WooCommerce will mark it as unavailable — make sure your bundle UI reflects this so customers aren’t frustrated
- For Mix & Match bundles, set minimum stock alerts on all eligible products, not just your best sellers
- Consider making your highest-margin or lowest-stock items mandatory in the bundle (BundlePress supports mandatory vs. optional products) so you can control what gets sold
- Regularly audit your bundle performance using BundlePress’s Analytics dashboard (Pro) to see which bundle products are driving the most revenue
5
Place Bundles Strategically on Your Store
Where you display your bundle is almost as important as what’s in it. High-converting bundle placements include:
- On the product page itself (most common — BundlePress injects the bundle display directly into the product page)
- Frequently Bought Together section below the Add to Cart button (BundlePress’s FBT bundle type handles this elegantly)
- The cart page — upsell a bundle to customers who only have individual items in their cart
- A dedicated bundles page or “Shop by Bundle” category page
- Email marketing — showcase your best bundles in post-purchase emails to drive repeat orders
6
Test, Measure, and Iterate
Don’t set and forget your bundles. The most successful WooCommerce store owners treat bundles as living promotions that need regular optimization:
- Track click-through and add-to-cart rates for each bundle
- Test different discount levels (e.g., 10% vs. 15% off) to find the optimal conversion point
- Rotate products in your bundles seasonally to stay relevant
- Use BundlePress’s Analytics dashboard (Pro) to identify your top-performing bundles and double down on what works
Frequently Asked Questions (FAQ)
Conclusion
Learning how to create bundle products in WooCommerce is one of the highest-ROI investments you can make in your store. Bundles increase average order value, clear slow-moving inventory, simplify the buying decision, and create a genuinely premium shopping experience for your customers.
To recap the two methods covered in this guide:
- BundlePress (Recommended): A full-featured, professional WooCommerce create bundle solution supporting Fixed Bundles, Volume Pricing, BXGY, Mix & Match, and Frequently Bought Together. Includes bundle discounts, a single add-to-cart experience, customizable styling, and analytics. Free version available; Pro unlocks unlimited products and advanced features.
- WooCommerce Grouped Product (Free, Limited): A native WooCommerce option that groups product links on one page without true bundle pricing. Suitable as a very basic starting point, but not a replacement for a proper bundle plugin.
If you’re serious about growing your WooCommerce store’s revenue through product bundling, BundlePress is the clear choice. Its drag-and-drop builder, variety of bundle types, and flexible pricing engine give you everything you need to create compelling, conversion-optimized bundles — without writing a single line of code. It’s the smartest way to woocommerce create bundle products that customers actually love.
Ready to Start Bundling?
Install BundlePress today and create your first high-converting WooCommerce bundle in minutes — no coding required.
