

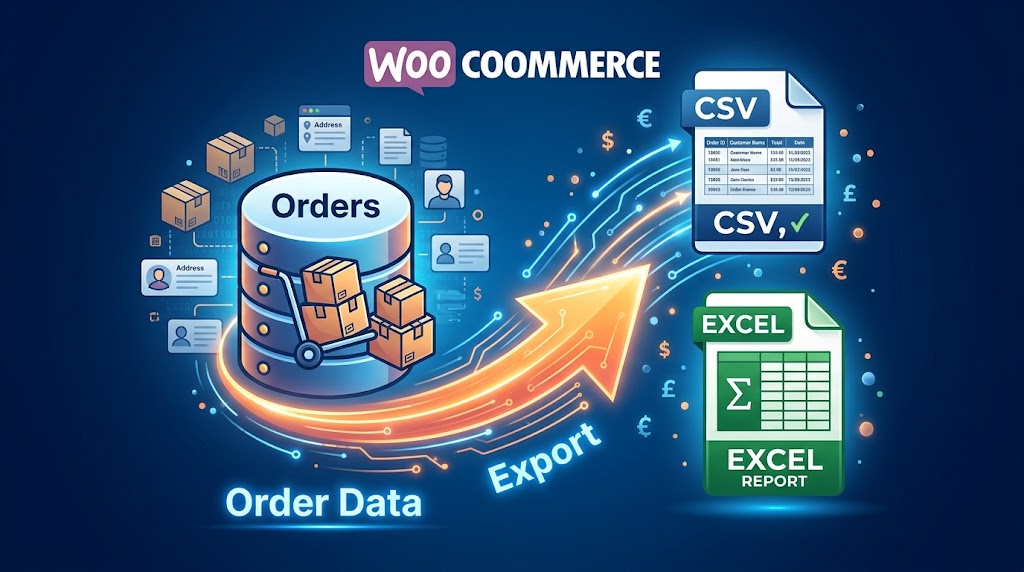
Every WooCommerce store owner eventually faces the same need: getting order data out of WordPress and into a format they can actually work with. Whether you need to reconcile revenue in a spreadsheet, hand off a fulfillment list to a warehouse team, produce reports for an accountant, or simply archive a month’s worth of transactions — knowing how to export orders from WooCommerce is a foundational skill every store operator must master.
The challenge is that WooCommerce’s native order management is designed for viewing and processing orders, not for exporting and analyzing them at scale. The built-in export capability is limited, leaving many store owners hunting for workarounds — or worse, manually copy-pasting data row by row.
This comprehensive guide covers every method available to you: from WooCommerce’s native tools to advanced solutions designed for high-volume stores and multi-site networks. By the end, you’ll have a complete playbook for WooCommerce order export — and you’ll know exactly when to reach for a more powerful tool to handle the heavy lifting automatically.
1. Why Exporting Orders from WooCommerce Matters
Before we get into the mechanics, it’s worth understanding the full scope of why exporting orders from WooCommerce is such a high-priority task for growing stores. The reasons span accounting, operations, customer service, and business intelligence:
Accounting & Bookkeeping
Your accountant needs order totals, taxes, refunds, and payment methods in a spreadsheet format — not screenshots from the WooCommerce admin panel.
Fulfillment & Shipping
Warehouse teams and shipping providers need order CSVs with addresses, SKUs, and quantities — not access to your WordPress admin.
Sales Reporting & Analytics
Build custom revenue dashboards, analyse performance by product or region, or feed data into Google Data Studio and Power BI for deeper insights.
Tax Compliance & Audits
VAT returns, sales tax filings, and financial audits all require detailed transaction records that are far easier to manage from a structured CSV than from the WooCommerce dashboard.
Returns & Dispute Management
Quickly locate specific orders, verify purchase history, and document refund decisions when you have a clean, searchable record of all transactions.
CRM & Email Marketing
Import order history into your CRM or email platform to trigger loyalty campaigns, re-engagement sequences, and post-purchase flows based on actual purchase data.
The common thread across all of these scenarios is that your order data lives inside WooCommerce’s database, and you need a reliable, repeatable method to get it out in a usable format. Let’s look at exactly how to do that.
2. The Built-In WooCommerce Order Export Method
Here’s a detail that surprises many new WooCommerce users: WooCommerce does not have a dedicated order export button by default. Unlike the product catalog — which has had a built-in CSV exporter since version 3.1 — the orders screen relies on WordPress’s standard admin export, which offers very limited order-specific data.
However, there are two legitimate built-in approaches you can use without installing a plugin. Here’s a walkthrough of both:
WordPress Tools → Export (Basic)
This is WordPress’s native XML export tool, adapted for WooCommerce orders. Navigate to Tools → Export in your WordPress dashboard. You’ll see an option for “Orders.” Select it, apply any date filters, and click “Download Export File.”
⚠️ Limitation:
This produces a WordPress WXR (XML) file — not a CSV. It’s useful for migrating orders to another WordPress site but is essentially unusable for spreadsheet analysis without conversion. Most accountants and analysts won’t be able to open it as-is.
WooCommerce Analytics → Revenue Report
In WooCommerce 4.0 and later, the Analytics section under WooCommerce → Analytics → Orders includes a Download button that exports visible order data as a CSV. This is the closest thing to a native order CSV export and is available in all modern WooCommerce installations. Here’s how to use it step by step:
Go to WooCommerce → Analytics → Orders in your WordPress admin sidebar.
Use the date range picker in the top right to filter the orders you want to export — options include Today, Yesterday, Week to Date, Last Week, Month to Date, Last Month, Quarter to Date, Last Quarter, Year to Date, Last Year, or a custom date range.
Apply any additional filters — you can filter by order status (Completed, Processing, On Hold, etc.), product, coupon used, or customer type (new vs. returning).
Scroll down to the Orders table beneath the charts. Click the “Download” button (cloud with arrow icon) in the top right corner of the table.
WooCommerce generates and downloads a CSV file containing the orders visible on screen, respecting your filters and date range. This is your WooCommerce order export file.
📌 Important Note on Scale
The Analytics download only exports what’s currently displayed on the table — typically limited to 25 rows per page. For stores with hundreds or thousands of orders, you need to either increase rows per page (up to 100) or use a dedicated export solution. We cover both approaches further in this guide.
3. Filtering Orders & Selecting the Right Columns
One of the most important skills in WooCommerce orders export is knowing how to filter before you export. Exporting your entire order history every time you need a specific dataset is inefficient and produces bloated files. Here’s a breakdown of the key filters available in WooCommerce Analytics and how to use them strategically:
| Filter Type | Options Available | Best Used For |
|---|---|---|
| Date Range | Today, Last 7 days, Last 30 days, Month to Date, Last Month, Custom | Monthly accounting, weekly fulfillment runs, year-end tax reports |
| Order Status | Completed, Processing, On Hold, Pending, Cancelled, Refunded, Failed | Pulling only fulfilled orders for accounting; pending orders for follow-up |
| Product | Filter by one or more specific product names or SKUs | Supplier-specific order reports, commission tracking, product performance |
| Coupon | Filter orders that used a specific coupon code | Measuring campaign ROI, affiliate tracking, discount code effectiveness |
| Customer Type | New customers vs. returning customers | Acquisition vs. retention analysis, LTV calculations |
Choosing Which Columns to Include
The WooCommerce Analytics order export includes a standard set of columns. While you can’t fully customize columns in the native tool (that’s a feature reserved for third-party plugins), knowing what’s included helps you plan your workflow:
For many use cases, these columns are sufficient. However, fields like billing address, shipping address, individual line item SKUs, payment method, and customer phone number are not included in the native Analytics export — they require a dedicated export plugin or a tool with deeper WooCommerce API access.
4. Opening WooCommerce Exports in Excel Correctly
Once you have your WooCommerce export orders CSV file, the most common next step is opening it in Microsoft Excel or Google Sheets. This sounds simple but frequently causes formatting problems — broken special characters, dates displayed incorrectly, numbers stored as text. Here’s how to get it right every time:
Opening in Microsoft Excel (The Right Way)
💡 Google Sheets Is Often Easier
For most export orders from WooCommerce workflows, Google Sheets handles UTF-8 CSV imports more gracefully than Excel. Simply go to File → Import, upload your CSV, and select “Comma” as the separator type. Google Sheets correctly detects UTF-8 encoding automatically, preserving all special characters without any additional configuration steps.
5. What Your WooCommerce Order Export CSV Actually Contains
Understanding the structure of a WooCommerce order export file helps you know what you’re working with — and what you may need to supplement from other sources. Here’s what the WooCommerce Analytics CSV export includes, compared to what it doesn’t:
What IS Included (Analytics Export)
- Order number and date
- Order status
- Customer name and email
- Product name(s) purchased
- Quantity of items
- Coupon codes used
- Net revenue
- Shipping total
- Taxes charged
- Order total
What is NOT Included (Native Export)
- Billing address (full)
- Shipping address (full)
- Phone number
- Product SKUs
- Individual variation details
- Payment method / gateway
- Customer notes
- Custom order meta fields
- Refund details
- Transaction / payment IDs
For most reporting purposes, what’s included in the Analytics export is enough. But for fulfillment operations, accounting integrations, or customer service workflows — where you need addresses, phone numbers, and SKUs — the native tool falls short. This is where a dedicated plugin or a more advanced management tool becomes essential to properly handle WooCommerce orders export at scale.
6. Common Problems When Exporting Orders & How to Solve Them
Even seasoned WooCommerce users run into frustrating issues when exporting orders. Here are the most common ones — and the proven fixes for each:
7. The Multi-Store Order Export Challenge
For store owners managing a single WooCommerce site, the Analytics export method — while imperfect — gets the job done. But there’s a category of merchant for whom the standard approach breaks down entirely: those running multiple WooCommerce stores.
Consider this scenario: you run three WooCommerce stores — your main brand store, a regional outlet for international customers, and a B2B wholesale portal. Every month, your accountant asks for a consolidated order report covering all three sites. Your current process:
😩 The Manual Multi-Store Export Nightmare:
Log in to Store 1 → Navigate to Analytics → Set date range → Export CSV → Download
Log out → Log in to Store 2 → Repeat entire process
Log out → Log in to Store 3 → Repeat entire process
Open all three CSVs → Add a “Store Name” column to each → Merge into one master file → Format totals
Send to accountant → Wait for queries about formatting inconsistencies between stores
⏱️ Time cost: 45–90 minutes every single month. Every month.
This is the exact operational bottleneck that points toward needing an advanced order export for WooCommerce — a tool that can aggregate order data from multiple stores in one place and produce a clean, consolidated export in a fraction of the time.
Fortunately, this is a solved problem. And the solution doesn’t require stitching together multiple plugins or writing custom code. It requires the right multi-store management tool — which brings us to ShopCentral.
8. ShopCentral: Advanced Order Export for WooCommerce
What makes ShopCentral relevant specifically to the question of how to export orders from WooCommerce is the depth and breadth of its Export Tools feature. Rather than patching over WooCommerce’s native limitations with a minimal workaround, ShopCentral rebuilds the export experience from the ground up using the WooCommerce REST API.
The plugin connects your “hub” site to any number of remote WooCommerce stores. From that central dashboard, you can pull and export data from all connected stores simultaneously — with each row clearly tagged with the source store name. There’s no logging in and out, no merging of multiple files, no manual formatting. One click, one clean CSV.
How ShopCentral’s Order Export Works — Under the Hood
ShopCentral’s export engine queries the WooCommerce REST API (wc/v3/orders) for each connected store, handling pagination automatically — fetching up to 100 orders per page across up to 10 pages per store (1,000 orders per store per export). The results are aggregated into a single dataset with a consistent column structure.
Each order row in the export contains the following fields, pulled directly from the WooCommerce order object:
| Field | Description | Useful For |
|---|---|---|
| Store | Name of the connected store this order came from | Filtering and consolidating multi-store reports |
| Order ID | WooCommerce order number from the source store | Cross-referencing with individual store admin |
| Date | Order creation date and time (Y-m-d H:i:s) | Period filtering, chronological sorting |
| Status | Order status (completed, processing, on-hold, etc.) | Filtering fulfilled vs. unfulfilled orders |
| Total | Full order total (numeric, no currency symbol) | Revenue summing, financial reconciliation |
| Currency | Order currency code (e.g., USD, GBP, EUR) | Multi-currency international store reporting |
| Customer Email | Billing email address from the order | CRM imports, email campaign audience building |
| Payment Method | Payment gateway used (e.g., Stripe, PayPal) | Payment method analytics, gateway fee reconciliation |
🗓️ Export Period Filtering
ShopCentral’s order export supports three time-period presets, making it immediately useful for the most common reporting cycles:
This Month
1st of current month to today. Perfect for monthly accounting runs.
This Year
January 1st to December 31st. Ideal for annual tax reporting.
All Time
Complete historical order data. Great for audits and full archive exports.
Beyond Orders: ShopCentral’s Full Export Data Suite
While the WooCommerce export orders capability is arguably the most used feature, ShopCentral’s Export Tools cover your entire store data ecosystem. From the same Export Tools dashboard, you can generate cross-store CSV exports for:
📦
Products
Product ID, name, type, price, stock quantity, and status — across all connected stores simultaneously.
⭐
Product Reviews
Reviewer name, email, rating, review content, date, and approval status from all stores.
🗂️
Categories & Tags
Category hierarchy, slugs, descriptions, parent relationships, and product counts — with tag equivalents.
👥
Customers
Customer names, emails, order counts, total spend, usernames, and registration dates — invaluable for CRM and LTV analysis.
🎟️
Coupons
Coupon codes, discount types, amounts, usage counts, usage limits, expiry dates, and free shipping flags.
📋
PDF Revenue Reports
Invoice-style summary reports showing total orders, revenue, and average order value per store — formatted for stakeholder presentations and board meetings.
⚡ Performance-First Architecture
A key differentiator worth noting: ShopCentral uses an on-the-fly proxy architecture. It doesn’t store all your remote store data in your hub site’s database — it fetches it via the WooCommerce REST API at export time. This means your central site stays lean and fast regardless of how many stores you connect or how many orders they collectively hold. The export process is executed without bloating your WordPress database.
🔄 Bonus: Automatic Order Sync (ShopCentral Pro)
Beyond export tools, ShopCentral Pro takes the entire order management workflow to another level with its automatic order import and synchronization feature. Using WooCommerce webhooks and background queue processing (via Action Scheduler), ShopCentral can automatically import orders placed on any connected child store as real WooCommerce orders on the hub site — complete with billing, shipping, line items, and customer data.
This means your hub site always has a real-time, consolidated view of orders across your entire network — no manual exporting, no merging, no delays. For agencies or high-volume operators managing multiple stores, this feature alone is a game-changer for operational efficiency and accounting accuracy.
9. Real-World Use Cases for WooCommerce Order Data
Knowing how to export orders from WooCommerce is only half the skill — the other half is knowing what to do with that data. Here are practical, actionable examples of how store operators use their exported order data:
📈
Monthly Revenue Dashboard in Google Sheets
Export all completed orders for the month. Use Google Sheets’ SUMIF and pivot tables to break down revenue by product category, payment method, and week. Visualize trends with charts and share the living document with your business partner or investor without ever giving them WooCommerce admin access.
🤝
Supplier Reconciliation & Commission Tracking
If you sell products from multiple suppliers or run an affiliate programme, export orders filtered by product and cross-reference SKUs against supplier price lists to calculate your cost of goods and net margin. Automate the calculation for commission payouts to affiliates or sales reps.
📬
Email Re-engagement Campaigns
Export customers who purchased in Q4 of last year but haven’t bought in the current year. Import the email list into Klaviyo, Mailchimp, or ActiveCampaign to trigger a win-back campaign with a personalised offer. Order-based segmentation like this drives dramatically higher conversion rates than generic newsletter blasts.
🏭
Warehouse Fulfillment Lists
For stores using a third-party logistics (3PL) provider, daily order exports are often the primary data handoff mechanism. Export all “Processing” orders each morning and send the CSV to your warehouse team with a consolidated pick-and-pack list showing product names, SKUs, quantities, and shipping addresses.
🧮
VAT & Sales Tax Filing
For quarterly VAT returns in the UK or EU, or sales tax filings in the US, export all completed and refunded orders for the period. Use the Tax Total column to validate against your WooCommerce tax reports and provide your accountant with a full audit trail of all taxable transactions and any applicable refunds.
10. Best Practices for WooCommerce Orders Export
Applying the right habits around exporting orders from WooCommerce prevents data errors, saves time, and keeps your financial records clean. Here are the practices followed by experienced store operators:
Establish a Regular Export Schedule
Export orders on the same day each month (e.g., the 1st). Consistent scheduling makes reconciliation easier and prevents the common mistake of overlapping date ranges between exports, which creates duplicate rows in consolidated reports.
Always Include Refunds in Your Export
Export all order statuses, including Refunded and Cancelled. Your accounting records must reflect the net position after refunds. Exporting only Completed orders understates gross sales and overstates net revenue on refund-heavy product lines.
Store Exports in a Dated Archive
Save each export in a clearly named folder: orders_2026-07.csv. Store these in Google Drive or Dropbox for at least 7 years to satisfy typical tax audit retention requirements in most jurisdictions.
Cross-Validate Against WooCommerce Reports
After every major export, compare the total revenue figure in your CSV (sum of the Total column) against the WooCommerce → Analytics → Revenue report for the same period. A discrepancy signals a filtering error or missing orders that you can investigate before handing off to your accountant.
Protect Customer Data in Exports
Order exports contain personally identifiable information (PII) — names, emails, and addresses. Treat these files as sensitive data under GDPR, CCPA, or equivalent regulations. Never email unencrypted order CSVs to third parties. Use shared secure cloud folders with access controls instead.
Automate When Volume Justifies It
If your store processes more than 200 orders per month across multiple stores, the time cost of manual WooCommerce order export starts to add up materially. At that volume, tools like ShopCentral’s centralised export dashboard begin to pay for themselves in saved labour hours within the first month of use.
11. Final Thoughts
Understanding how to export orders from WooCommerce isn’t just a technical skill — it’s an operational foundation. The ability to pull your order data into a structured, portable format is what connects your store to your accountant, your warehouse, your marketing platform, and your strategic decision-making.
For single-store operators, WooCommerce’s built-in Analytics export covers the essentials. Use the date filters, set rows per page to 100, open in Google Sheets with UTF-8 encoding, and you’re in business. Pair that with the troubleshooting steps and best practices in this guide, and you’ll avoid the most common pitfalls that trip up store owners every month.
For merchants running multiple stores — or for anyone who finds themselves spending more than 30 minutes a month on WooCommerce order export tasks — the answer is clear: invest in a tool that removes the manual work entirely. ShopCentral’s centralised Export Tools give you cross-store order data in seconds, with built-in period filtering and consistent column formatting that your accountant will actually appreciate. And when you’re ready to take the next step, its automatic order sync turns your hub site into a live, real-time command centre for your entire WooCommerce network.
The goal is to spend less time exporting and more time making decisions based on what that data tells you. That’s the outcome these tools are designed to deliver.
