

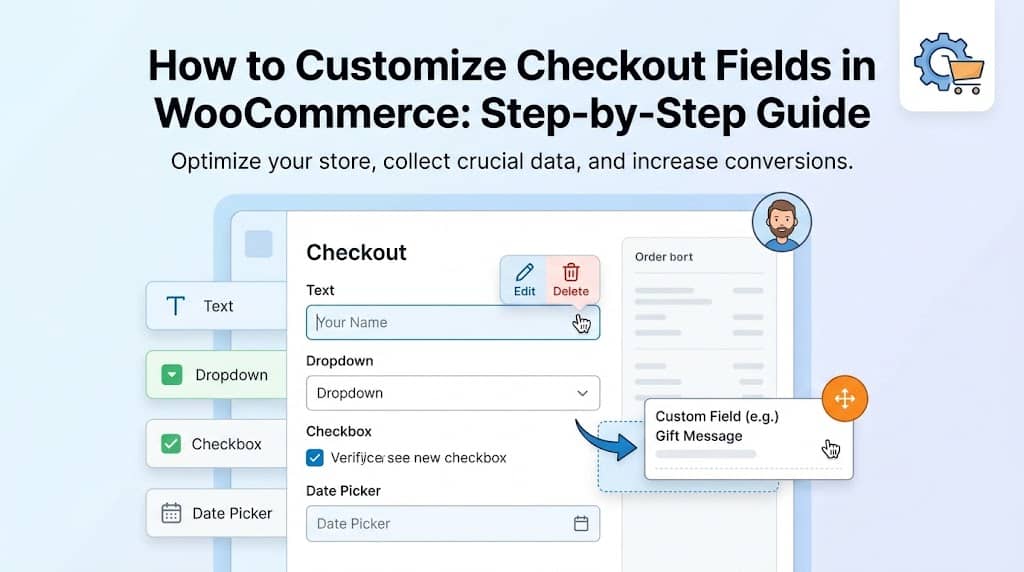
1. Why Customizing Your WooCommerce Checkout Matters
Your WooCommerce checkout page is arguably the single most important page on your entire online store. It is the last interaction between you and a customer who is already ready to hand you their money — and yet, according to the Baymard Institute, the average documented online shopping cart abandonment rate is a staggering 70.19%. A significant portion of those lost sales happen directly on the checkout form.
The reasons customers abandon at checkout are well-researched: too many form fields, irrelevant questions, confusing layouts, and a general feeling that the checkout process is “too complicated.” On the flip side, some businesses — particularly B2B sellers, gift shops, and custom goods retailers — desperately need extra information from their customers that WooCommerce doesn’t collect by default.
The solution to both problems is the same: take full control of your checkout form. Whether you need to remove friction by deleting unnecessary fields or add value by collecting critical extra data, the answer lies in a powerful checkout field editor for WooCommerce.
2. The Limitations of WooCommerce’s Default Checkout
Out of the box, WooCommerce provides a solid — but completely generic — checkout form. It includes standard billing fields (name, address, email, phone), an optional shipping address, and a text area for order notes. This one-size-fits-all approach means:
Too Many Fields for Digital Goods
Selling eBooks or software? Asking customers for a full postal address creates unnecessary friction.
Missing Fields for B2B Stores
No VAT number, PO number, or company registration field by default — essential for business buyers.
No Conditional Logic
You can’t show or hide fields based on other field values — which makes forms feel static and bloated.
Coding Required for Changes
Editing default fields requires modifying PHP hooks — a skill most store owners simply don’t have.
The good news? You don’t need to touch a single line of PHP. Modern WooCommerce checkout page editors give you a visual, drag-and-drop interface to manage every aspect of your checkout form with ease.
3. What is a Checkout Field Editor for WooCommerce?
A checkout field editor for WooCommerce is a WordPress plugin that gives you a graphical admin interface to manage the fields that appear on your WooCommerce checkout page. Instead of writing PHP filter hooks like woocommerce_checkout_fields, you simply open the plugin’s dashboard, click a few buttons, and your checkout form updates instantly.
A quality WooCommerce checkout form editor typically lets you:
- Add new custom fields — text boxes, dropdowns, checkboxes, date pickers, file uploads, and more.
- Edit existing default fields — rename labels, add placeholders, change required status.
- Disable or hide fields — remove fields that aren’t relevant to your products.
- Reorder fields — drag and drop to change the sequence in which fields appear.
- Set conditional logic — display fields only when certain conditions are met.
- Control field width — make fields full-width or half-width to organize your layout.
💡 Pro Insight: A great checkout field editor checkout manager for WooCommerce doesn’t just add new fields — it gives you total command over the data collection, validation, storage, and display of every piece of customer information at checkout. That holistic approach is what separates a basic field editor from a true checkout management platform.
4. Introducing CheckoutCrafter: The Best Checkout Editor for WooCommerce
Among the various tools available, one plugin stands head and shoulders above the rest for store owners who want both power and elegance: CheckoutCrafter – Advanced Checkout Field Editor. Developed by Dominopress, CheckoutCrafter is a modern, React-powered checkout editor for WooCommerce built with a hyper-focus on User Experience and workflow efficiency.
What immediately sets CheckoutCrafter apart from legacy alternatives is its interface. When you land on its admin page, you’re not greeted by a clunky table of PHP field keys — instead, you step into a beautiful, glassmorphic drag-and-drop dashboard powered by Chakra UI and Framer Motion animations. It feels premium because it is premium.
The plugin architecture is elegantly structured. Under the hood, it hooks directly into WooCommerce’s native filter system — specifically woocommerce_checkout_fields, woocommerce_billing_fields, and woocommerce_shipping_fields — which means it plays nicely with virtually every WooCommerce-compatible theme. Your configurations are stored safely in the WordPress database via the checkoutcrafter_checkout_fields option, ensuring your customizations persist through plugin updates.
5. Deep Dive: Key Features of CheckoutCrafter
As the definitive WooCommerce checkout field editor and manager, CheckoutCrafter packs a remarkable feature set into a beautifully organized interface. Let’s explore what makes it such a powerful tool.
Feature 1: Drag-and-Drop Visual Editor
The editor’s React-powered drag-and-drop interface allows you to grab any field by its grip handle and reorder it within your billing, shipping, or additional fields sections. This isn’t just cosmetic — the order you see in the editor is the exact order your customers see at checkout. Changes are applied instantly with smooth Framer Motion animations, making the design process genuinely enjoyable.
Feature 2: 11+ Field Types
One of the most critical capabilities of any woocommerce checkout form editor is the variety of field types it supports. CheckoutCrafter’s field library is extensive:
Feature 3: Total Control over Default WooCommerce Fields
This is where CheckoutCrafter truly shines as a checkout field editor checkout manager for WooCommerce. You’re not limited to only adding new fields — you have complete editorial authority over every single default WooCommerce checkout field too. Want to rename “Company name” to “Business Name”? Done. Need to make “Phone number” optional instead of required? One toggle. Want to disable “Address Line 2” entirely to de-clutter the form? Just uncheck “Enabled.” All of this without touching functions.php or a child theme.
Feature 4: Advanced Conditional Logic
Conditional logic is the magic ingredient that transforms a static checkout form into a smart, dynamic experience. CheckoutCrafter supports “if/then” conditional rules — for example, “Show the ‘VAT Number’ field only if the ‘Purchasing for Business’ checkbox is checked.” The logic engine runs client-side via an injected JavaScript listener that evaluates conditions in real-time as customers fill in the form, ensuring a perfectly smooth and instantaneous user experience.
Feature 5: Role-Based Visibility & Precise Display Rules
CheckoutCrafter lets you restrict specific fields to appear only for certain WordPress user roles. For instance, a “Wholesale Account Number” field could be restricted to appear only for users assigned the “Wholesale Customer” role, keeping the form clean for regular retail shoppers. Additionally, for every custom field you add, you can granularly control where its collected data is displayed: on the Thank You page, in customer receipt emails, or inside the WordPress Admin Order view.
6. Step-by-Step: How to Customize Your Checkout Fields
Now let’s walk through the actual process of customizing your WooCommerce checkout using CheckoutCrafter. This is the complete, practical guide to becoming a power user of the best checkout field editor for WooCommerce available today.
Install & Activate CheckoutCrafter
Log into your WordPress admin dashboard. Navigate to Plugins → Add New. Search for “CheckoutCrafter” and click Install Now, then click Activate. Within seconds, you’ll see a new CheckoutCrafter menu item appear in your WordPress admin sidebar — and a convenient Edit Checkout quick-link on the plugins list page.
✅ Tip: After activation, verify that WooCommerce is already installed and active — CheckoutCrafter requires WooCommerce to be present.
Open the CheckoutCrafter Dashboard
Click CheckoutCrafter in the left-hand WordPress admin menu. You will be taken into the fully immersive, distraction-free editor — all WordPress notifications and footers are hidden to give you a clean working environment. On first load, the plugin automatically reads your WooCommerce default fields and populates the editor, so you’re always starting from a real, accurate baseline.
Navigate Between Checkout Sections
The checkout is organized into three distinct sections via the top navigation tabs:
- Billing Fields — Customer’s billing information (name, address, email, phone)
- Shipping Fields — Destination address for physical goods
- Additional Fields — Order notes and any custom fields placed after the shipping section
Add a New Custom Field
Click the bright + Add field button. A new field row will instantly appear at the bottom of the list. Click the Edit button on that row to open the rich Settings Modal, which contains three tabs:
General Tab
Set label, field type, placeholder text, help text, required toggle, and width (full or half).
Logic Tab
Define conditional “If/Then” rules — show or hide this field based on other fields’ values.
Rules Tab
Toggle display on Thank You page, emails, and Admin Orders. Restrict by user role.
Reorder Fields with Drag and Drop
After configuring your field settings and clicking Apply Changes, you can grab the grip handle icon on the left side of any field row and drag it to its ideal position. The order is automatically translated into WooCommerce’s internal priority values behind the scenes — so your visual layout is exactly what customers experience.
Save Your Changes & Test
Once you’re satisfied with your design, click the prominent Save changes button in the top-right corner. Your configuration is sent via the plugin’s secure REST API endpoint (checkoutcrafter/v1/api/wp-checkout-fields) and stored in your WordPress database. Then open your checkout page in a new browser tab and see your newly customized form in action.
💡 Pro Tip: Use Reset to default fields any time you want to start fresh. This wipes all customizations and restores the exact WooCommerce default checkout — a great safety net when experimenting.
7. Real-World Use Cases for a WooCommerce Checkout Page Editor
The true power of a woocommerce checkout page editor becomes clear when you see how different types of stores use it. Here are the most impactful real-world applications:
B2B & Wholesale Stores
Add VAT ID, Tax Registration Number, Purchase Order Number, and Company Registration fields. Use role-based rules to show these fields only to verified wholesale accounts.
Gift & Occasion Shops
Add a “Gift Message” textarea and a “Preferred Delivery Date” date picker. Use conditional logic to show the gift message field only when “This is a gift” checkbox is checked.
Custom & Print-on-Demand
Add a “File Upload” field for customers to submit their logo or artwork. Add text fields for engraving instructions or personalization messages.
Digital Downloads & SaaS
Disable the entire shipping address section and remove irrelevant fields like Phone and Address Line 2. Create a frictionless, minimal checkout experience that drives higher conversion rates.
Food & Restaurant Delivery
Add “Delivery Time Slot” as a dropdown, “Dietary Requirements” as a checkbox group, and “Buzzer/Apartment Code” as a text field to streamline last-mile delivery logistics.
Online Courses & Events
Collect participant’s date of birth, experience level (dropdown), or dietary preferences for in-person events. Add a newsletter opt-in checkbox tied directly to the purchase flow.
8. How to Use Conditional Logic for Smart Checkouts
Conditional logic is one of the most powerful — and often underutilized — features of a great WooCommerce checkout field editor and manager. Instead of presenting every customer with every possible field, you create a dynamic form that shows only the fields relevant to each individual shopper based on what they’ve already entered.
Here’s how CheckoutCrafter implements this technically: When you save your conditional logic rules, they’re stored as JSON in the database. On the front-end checkout page, CheckoutCrafter injects a lightweight JavaScript snippet into the page footer via the wp_footer action. This script listens for the WooCommerce updated_checkout event and any change events on form inputs, evaluating all your conditions and showing or hiding field wrappers in real-time. The logic supports both equals and not_equals comparison operators.
📘 Conditional Logic Example: B2B Checkout
This approach radically simplifies the checkout experience for the majority of customers while ensuring you still collect the right data from customers who need to provide it. It’s a cornerstone feature of any truly professional checkout editor for WooCommerce.
9. Role-Based Visibility & Data Display Rules
One of the underappreciated superpowers of CheckoutCrafter as a WooCommerce checkout form editor is its dual-layered visibility system: role-based field display and post-order data display rules.
Role-Based Field Visibility
In the plugin’s PHP engine, the apply_section_fields() method checks the current logged-in user’s WordPress roles against each field’s configured role restrictions. If the user doesn’t have the required role, the field is simply skipped during checkout form rendering — it’s never sent to the browser. This is secure server-side enforcement, not just CSS hiding.
Where Custom Field Data Appears
After a customer submits the checkout, CheckoutCrafter saves all custom field values as WordPress post meta attached to the order. The display rules for each field then determine where this data surfaces:
| Display Location | When Enabled | Who Sees It |
|---|---|---|
| Checkout Page | Field appears in the live checkout form | Customers during purchase |
| Thank You Page | Data shown in order confirmation summary | Customers after successful order |
| Customer Emails | Included in WooCommerce receipt emails | Customers via email |
| Admin Orders | Shown in WP admin order detail page | Store managers and fulfillment team |
10. Best Practices for WooCommerce Checkout Optimization
Having access to a powerful checkout field editor for WooCommerce is one thing — knowing how to use it wisely is another. Here are the proven best practices that top-performing WooCommerce stores follow:
1. Ruthlessly Remove Unnecessary Fields
Every extra field is a potential reason for a customer to leave. If you’re selling digital products, disable the entire shipping section. If your business doesn’t need a phone number, make it optional or remove it.
2. Write Clear, Friendly Field Labels
Use conversational language in your labels. Instead of “Billing Address Line 1,” try “Street Address.” Instead of “billing_postcode,” write “Postcode / ZIP.” Rename WooCommerce defaults to match your brand voice.
3. Use Placeholder Text and Help Text Generously
Use the Placeholder field to show an example of the expected input (e.g., “e.g. GB123456789” for a VAT number). Add Help Text to explain why you’re collecting sensitive data — it builds trust and reduces abandonment.
4. Use Half-Width Fields to Save Vertical Space
Fields like First Name and Last Name are perfect candidates for half-width layout. By placing them side-by-side, you reduce the perceived length of the form, making checkout feel faster. CheckoutCrafter handles this automatically with WooCommerce’s form-row-first/last classes.
5. A/B Test Your Checkout Layout
Don’t assume — test. Try removing one field at a time and measure the impact on conversion rate over a 2-week period. Even small improvements in checkout form UX can translate to significant revenue gains at scale.
6. Only Make Fields Required When Truly Necessary
Required fields create hard blockers. If a customer can’t complete a field, they’ll leave. Only mark a field as Required if you genuinely cannot fulfill the order without that information. All other fields should be optional.
11. Frequently Asked Questions
Q: Does a checkout field editor for WooCommerce work with all themes?
Yes. CheckoutCrafter hooks into WooCommerce’s core PHP filters (woocommerce_checkout_fields, woocommerce_billing_fields, etc.), which are used universally by all WooCommerce-compatible themes. This makes it compatible with Storefront, Astra, OceanWP, Flatsome, GeneratePress, Divi, and virtually any well-coded WooCommerce theme.
Q: Will I lose my custom fields if I update CheckoutCrafter?
Absolutely not. All your field configurations are stored in the WordPress database via update_option('checkoutcrafter_checkout_fields', ...). Updating or even reinstalling the plugin files will never affect your stored database configurations.
Q: Can I hide default WooCommerce checkout fields without coding?
Yes. In CheckoutCrafter’s editor, click the Edit button for any default field (such as billing_company or billing_address_2) and toggle the “Enabled” switch to off. The plugin will then programmatically unset that field from the checkout form on every page load. No PHP required.
Q: Does adding custom checkout fields slow down my WooCommerce store?
No. CheckoutCrafter’s admin interface is built in React and is only loaded inside the WordPress admin dashboard — not on the front-end of your store. On the front-end, the plugin only injects a minimal conditional logic script when you actually have logic rules configured. Your checkout page performance is fully preserved.
Q: Can I allow customers to upload files at checkout?
Yes. CheckoutCrafter supports a dedicated “File Upload” field type. When a file field is detected, the plugin automatically adds enctype="multipart/form-data" to the checkout form via jQuery, allowing file submissions. Uploaded files are processed using WordPress’s native wp_handle_upload() function and the file URL is saved securely to the order’s post meta.
Q: What’s the difference between a woocommerce checkout page editor and just editing PHP?
PHP editing requires developer knowledge, is difficult to maintain, gets overwritten by theme updates, and provides no visual preview. A WooCommerce checkout page editor like CheckoutCrafter provides a visual GUI that any store owner can use, stores settings in the database (safe from updates), supports live preview, and makes changes reversible at any time with the “Reset to default fields” button.
12. Conclusion: Take Control of Your WooCommerce Checkout Today
Your WooCommerce checkout form is not a one-size-fits-all widget — it’s the most revenue-critical page on your store, and it deserves to be treated that way. Whether you’re running a lean digital download store that needs a stripped-back 3-field checkout, a B2B wholesale operation requiring tax ID and PO number collection, or a gift shop that needs personalization fields and conditional logic, the solution is the same: you need a dedicated checkout field editor for WooCommerce.
We’ve explored the full landscape in this guide — from understanding why checkout optimization matters to mastering advanced features like conditional logic and role-based visibility. And throughout this journey, one plugin has consistently stood out as the gold standard: CheckoutCrafter.
With its React-powered drag-and-drop interface, 11+ field types, real-time conditional logic engine, role-based restrictions, multi-location data display rules, and zero-code workflow, CheckoutCrafter is genuinely the most complete WooCommerce checkout field editor and manager available. It doesn’t just help you add fields — it gives you the complete toolkit to design, manage, and optimize a checkout experience that converts.
Ready to Get Started?
Stop Losing Sales at Checkout. Start Optimizing Today.
Install CheckoutCrafter from the WordPress Plugin Repository and transform your WooCommerce checkout in under 10 minutes. No coding, no frustration.
📌 Quick Recap: What We Covered
- Why a checkout field editor for WooCommerce is essential for every online store
- The limitations of WooCommerce’s default checkout form
- What features to look for in a WooCommerce checkout page editor
- How CheckoutCrafter’s drag-and-drop editor, 11+ field types, and conditional logic work together
- Step-by-step guide to adding, editing, and managing checkout fields
- Real-world use cases for B2B, gifting, custom goods, and digital products
- Best practices for maximizing checkout conversion rates
- Answers to common questions about the WooCommerce checkout form editor
This article contains information about CheckoutCrafter, a WooCommerce checkout field editor plugin. Feature descriptions are based on the plugin’s codebase and official documentation.
